TXF Export Guide
What is TXF?
Tax Exchange Format (TXF) is a file format designed specifically for transferring financial information to tax preparation software like TurboTax, H&R Block, and TaxAct. It allows you to import your business income and expenses directly into your tax forms, saving you time and reducing the risk of manual data entry errors.
Benefits of TXF Export
Time Saving
Eliminate hours of manual data entry by importing your financial data directly into tax software.
Error Reduction
Avoid manual entry mistakes that could lead to tax calculation errors or audits.
Detail Preservation
Maintain full transaction-level detail for better record-keeping and audit readiness.
Format Compatibility
Works with most popular tax preparation software including TurboTax, H&R Block, and TaxAct.
How to Generate a TXF Export
Click on the Exports tab in the main navigation menu.
Configure your export with the following settings:
- Business: Select the business whose data you want to export
- Accounting Method: Choose between Cash or Accrual basis
- Date Range: Typically the tax year (e.g., Jan 1 - Dec 31)
- Export Format: Select TXF
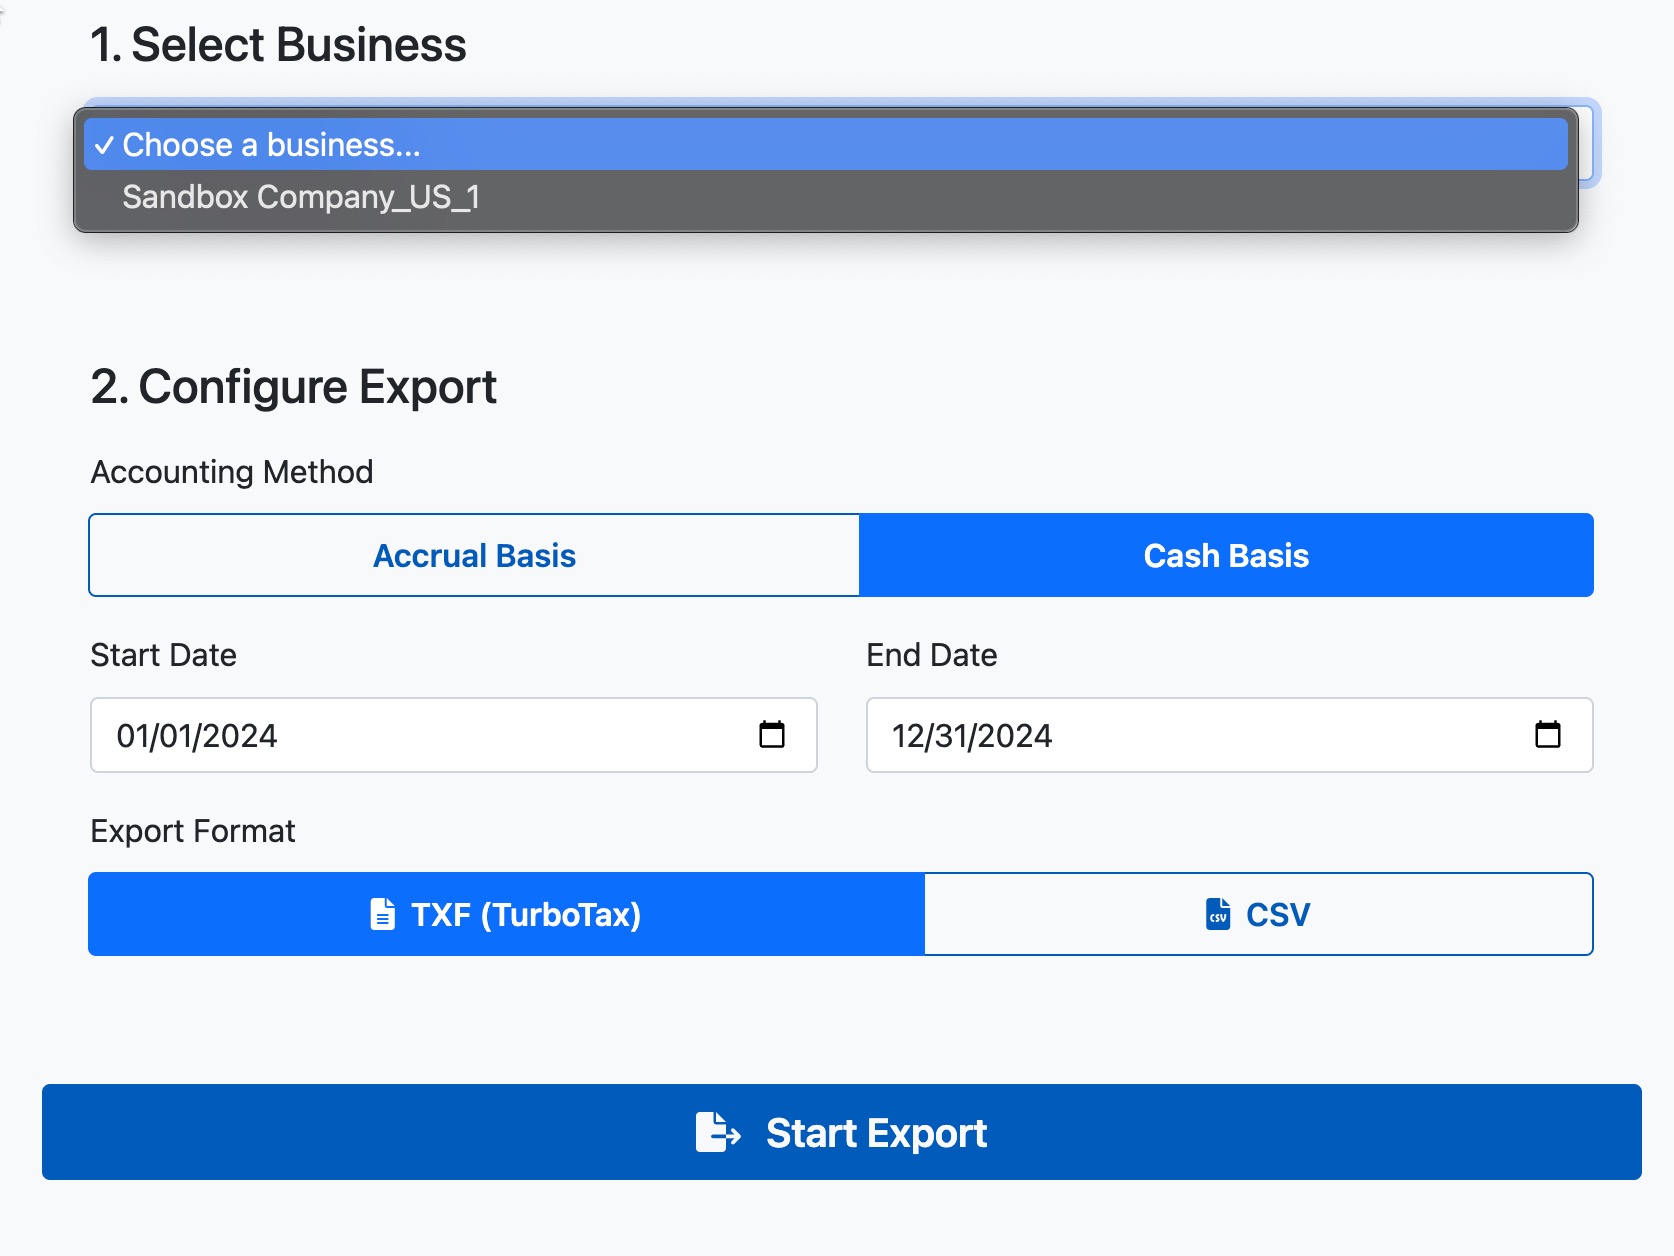
Click the Generate Export button. Once processing is complete, your browser will automatically download the TXF file.
Importing TXF into Tax Software
- Open TurboTax and navigate to your tax return
- From the main menu, go to File → Import → From Tax Exchange Format (.TXF) File
- Browse to locate your downloaded TXF file
- Review the imported data and confirm it appears correctly
- The data will be automatically mapped to the appropriate tax forms (typically Schedule C for business income)
- Open H&R Block tax software
- Go to File → Import → TXF
- Select your downloaded TXF file
- Follow the on-screen prompts to map the data to the correct forms
- Review the imported data
TXF Data Mapping
TaxBridge maps your QuickBooks categories to standardized tax form categories in the TXF file. Here's how common QuickBooks categories map to tax forms:
| QuickBooks Category | Tax Form/Line |
|---|---|
| Income/Revenue | Schedule C, Line 1 (Gross receipts or sales) |
| Advertising | Schedule C, Line 8 (Advertising) |
| Automobile Expense | Schedule C, Line 9 (Car and truck expenses) |
| Insurance | Schedule C, Line 15 (Insurance) |
| Office Expenses | Schedule C, Line 18 (Office expense) |
| Professional Fees | Schedule C, Line 17 (Legal and professional services) |
| Rent | Schedule C, Line 20a (Rent/lease) |
| Utilities | Schedule C, Line 25 (Utilities) |
Troubleshooting TXF Import Issues
If your tax software doesn't recognize the TXF file:
- Verify you're using the latest version of your tax software
- Make sure the file extension is .txf
- Try regenerating the export file
- Ensure your tax software supports TXF import
If data imports into incorrect categories:
- Check your QuickBooks category mapping
- Make sure your chart of accounts is properly set up
- You may need to manually adjust categories after import
- Consider using a CSV export for more control over categorization
If you notice data discrepancies:
- Compare the TXF data with your QuickBooks reports
- Verify you selected the correct date range and accounting method
- Check if any transactions were excluded from the export
- Resync your QuickBooks data if needed